Getting Started with RoostSync
Welcome to RoostSync, your centralized hub for managing vacation rental bookings across multiple platforms. This guide will walk you through the essentials to get you up and running quickly.
What is RoostSync?
RoostSync is a booking management application designed for property managers who list their vacation rentals on platforms like Airbnb and Agoda. Instead of juggling multiple tabs and manually tracking reservations, RoostSync automatically syncs your bookings by parsing confirmation emails from these platforms.
Key capabilities:
- Automatic email sync - Bookings from Airbnb and Agoda are imported automatically by parsing your Gmail inbox
- Unified dashboard - View all your properties and bookings in one place
- Revenue tracking - Monitor your monthly earnings and booking statistics
- Overlap detection - Get alerted to potential double-bookings across platforms
- Team collaboration - Invite property managers, cleaners, or co-hosts to your team
First-Time Login and Team Setup
Creating Your Account
- Navigate to the RoostSync login page
- Click Create Account
- Enter your email address and create a password
- Click Sign Up
- Check your email for a verification link (if required)
Setting Up Your Team
After your first login, you will be prompted to create a team. Teams are the foundation of RoostSync - they represent your property management business and contain all your properties, bookings, and team members.
- Click Create Team
- Enter your business name (e.g., "Coastal Vacation Rentals")
- Select your timezone - this ensures check-in/check-out times display correctly
- Click Create
You are now the Owner of your team with full administrative access.
Inviting Team Members
Once your team is set up, you can invite others to collaborate:
- Navigate to Settings > Team Members
- Click Invite Member
- Enter the team member's email address
- Select their role:
- Admin - Full access to settings and all operations
- Manager - Can manage bookings and view reports
- Staff - Can view and update bookings
- Viewer - Read-only access to the dashboard
- Click Send Invite
The invitee will receive an email with instructions to join your team.
Dashboard Overview
The dashboard is your command center for monitoring bookings and property performance. Here is what you will see when you log in:
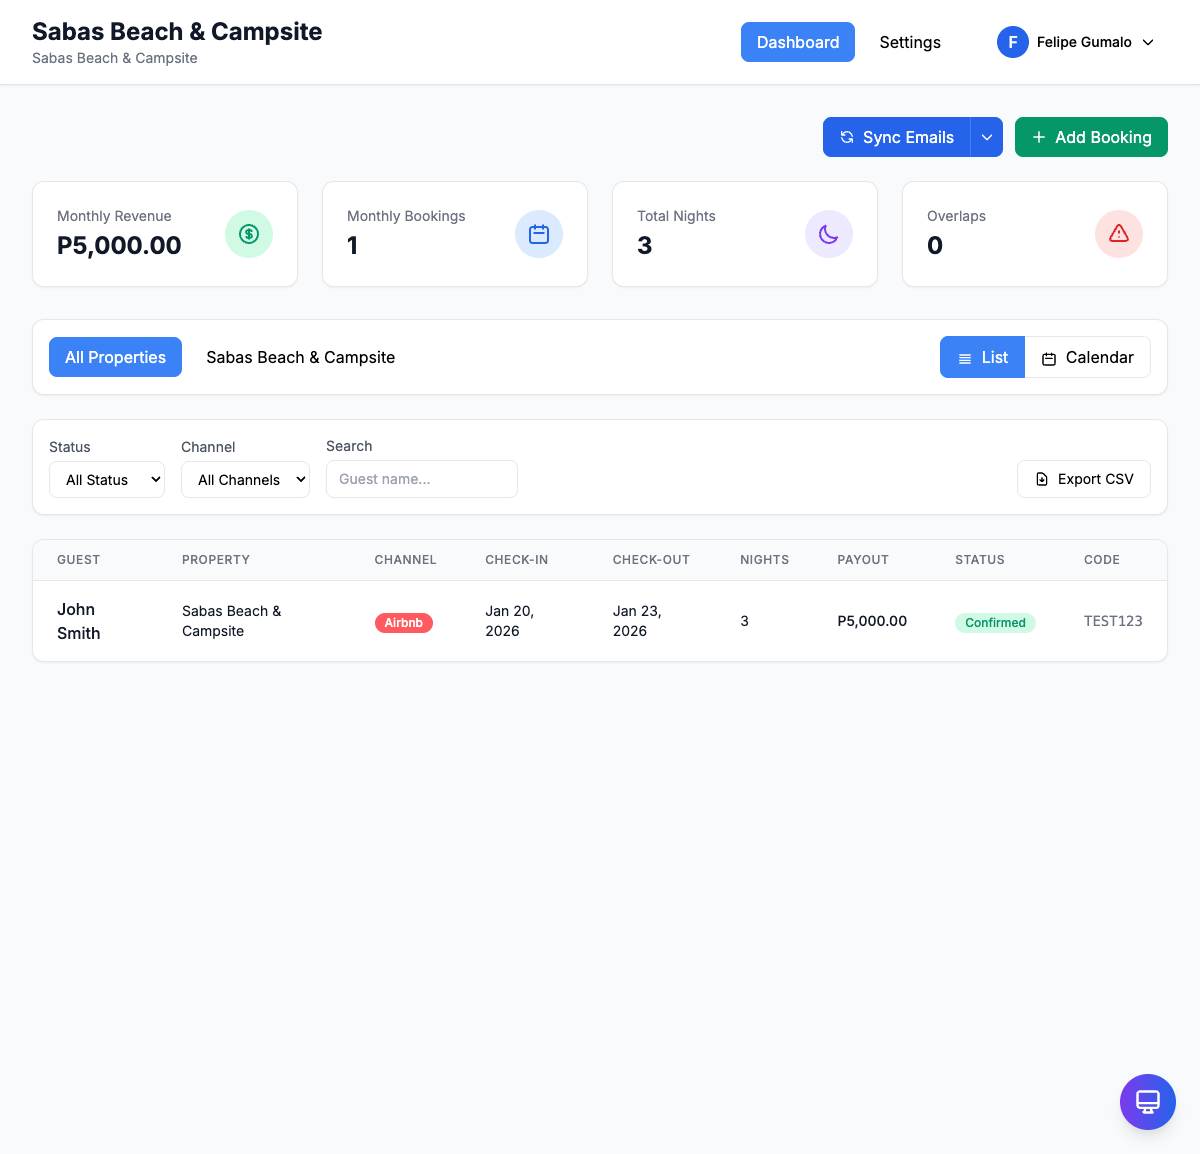
Stats Cards
At the top of the dashboard, you will find four key metrics for the current month:
| Card | What It Shows |
|---|---|
| Monthly Revenue | Total expected payout from all confirmed bookings this month |
| Monthly Bookings | Number of reservations with check-ins or check-outs this month |
| Total Nights | Combined nights booked across all properties this month |
| Overlaps | Number of potential double-bookings detected - requires immediate attention |
These stats update automatically as new bookings sync and provide a quick health check of your business.
Example: If you have 8 bookings this month averaging 3 nights each at $150/night, you would see approximately $3,600 in Monthly Revenue and 24 Total Nights.
Property Filter Tabs
Below the stats cards, you will see tabs for filtering by property:
- All Properties - Shows bookings across your entire portfolio
- [Property Name] - Each property gets its own tab for focused viewing
Click any property tab to filter the booking list to that specific rental.
View Modes
Toggle between two ways to visualize your bookings:
- List View - A sortable table showing all booking details at a glance
- Calendar View - A visual timeline showing occupancy across dates
Use List View when you need to search or export data. Use Calendar View when planning availability or checking for gaps.
Filters and Search
Narrow down your bookings using:
- Status Filter - Show only Confirmed, Pending, Cancelled, or Completed bookings
- Channel Filter - Filter by booking source (Airbnb, Agoda, Direct)
- Search - Find bookings by guest name, confirmation code, or property
Export CSV
Click the Export CSV button to download your filtered booking data as a spreadsheet. This is useful for:
- Accounting and tax preparation
- Sharing reports with co-owners
- Backing up your booking history
The Booking List
The main area of the dashboard displays your bookings in a table with the following columns:
| Column | Description |
|---|---|
| Guest | The guest's name from the booking platform |
| Property | Which property this booking is for |
| Channel | The source platform (Airbnb, Agoda, or Direct) |
| Check-in | Arrival date |
| Check-out | Departure date |
| Nights | Length of stay |
| Payout | Expected payment amount |
| Status | Current booking status (Confirmed, Pending, Cancelled, Completed) |
| Code | The confirmation code from the booking platform |
Click any row to view full booking details, add notes, or update the status.
Navigation
RoostSync keeps navigation simple with two main sections:
Dashboard Tab
Your primary workspace where you:
- View and manage all bookings
- Monitor stats and performance
- Switch between properties
- Search and filter reservations
Settings Tab
Configure your account and team:
- General - Team name, timezone, currency settings
- Properties - Add and configure your rental properties
- Team Members - Invite and manage your team
- Email Integration - Connect Gmail for automatic booking sync
- Billing - Manage your subscription
Quick Tips for Success
- Connect your Gmail first - Head to Settings > Email Integration to enable automatic booking sync. This is where the magic happens.
- Add your properties - Before bookings can sync, you need to add your properties with their Airbnb/Agoda listing IDs.
- Check overlaps daily - The Overlaps stat card alerts you to potential double-bookings. Address these immediately to avoid guest conflicts.
- Use the Calendar View - When a guest asks about availability, switch to Calendar View for a quick visual check.
- Export regularly - Download CSV exports monthly for your records and tax documentation.
Next Steps
Now that you understand the basics, here are recommended next steps:
- Learn how to manage bookings with views, filters, and email sync
- Add your properties with platform-specific listing IDs
- Invite your team members and assign appropriate roles
- Set up guest messaging for automated check-in instructions
Need help? Visit the full documentation or contact support.