Property Settings Guide
This guide walks you through configuring your team settings and managing your properties in RoostSync. Whether you are setting up your account for the first time or adding a new property to your portfolio, you will find everything you need here.
Accessing Settings
- Log in to your RoostSync account
- Click on the Settings tab in the main navigation bar
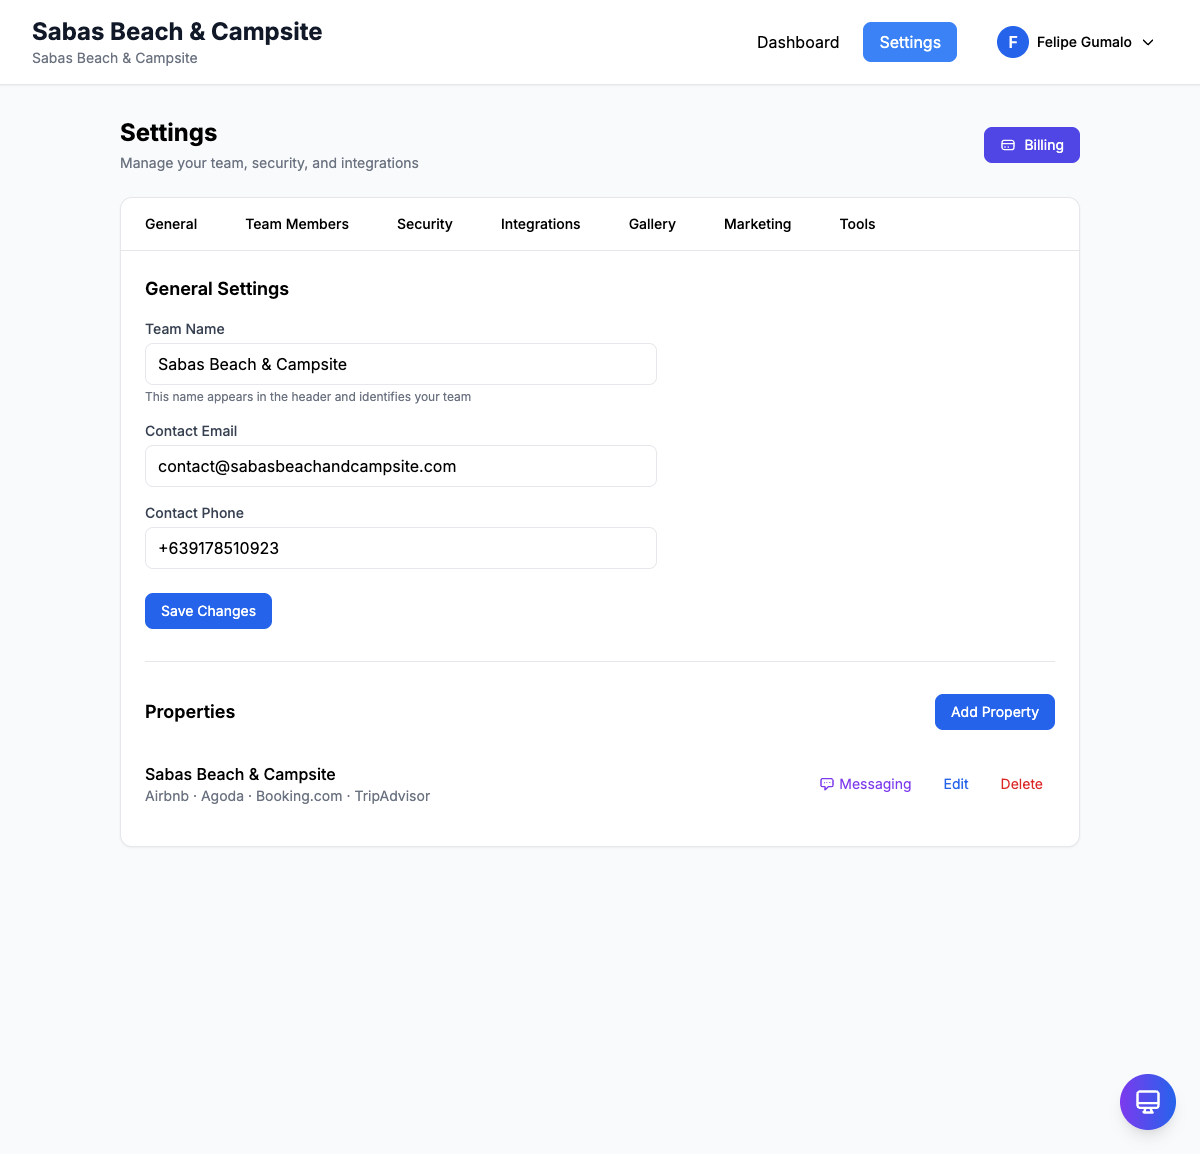
- You will see four tabs at the top of the Settings page:
- General - Team information and property management
- Team Members - Manage who has access to your account
- Marketing - Social media and promotional settings
- Integrations - Connect external services like Gmail and calendars
The General tab is selected by default and contains your core team and property configuration.
General Settings
The General Settings section allows you to configure your team's basic information. This information is used throughout the application and may appear in guest communications.
Team Name
Your team name identifies your business within RoostSync. This is typically your property management company name or business name.
To update your team name:
- Locate the Team Name field in the General Settings section
- Enter or modify your team name
- Click the Save Changes button at the bottom of the section
Contact Email
The contact email is your primary business email address. This email may be used for:
- System notifications
- Guest inquiries (if configured)
- Account-related communications
To update your contact email:
- Find the Contact Email field
- Enter your preferred email address
- Click Save Changes
Contact Phone
Your contact phone number is your primary business phone. This can be displayed to guests and used for urgent communications.
To update your contact phone:
- Locate the Contact Phone field
- Enter your phone number
- Click Save Changes
Tip: Remember to click Save Changes after updating any field to ensure your changes are saved.
Managing Properties
The Properties section displays all properties you manage. Each property card shows the property name and the booking channels it is connected to.
Viewing Your Properties List
Your properties appear in a list below the General Settings section. Each property entry displays:
- Property Name - The name of your property
- Connected Channels - Icons or labels showing which platforms the property is listed on (Airbnb, Agoda, Booking.com, etc.)
- Edit Button - Modify the property details
- Delete Button - Remove the property from your account
Adding a New Property
When you acquire a new property or want to start tracking an existing one:
- Scroll to the Properties section on the General tab
- Click the Add Property button
- Fill in the property details:
- Property Name - A descriptive name for your property
- Address - The property location
- Description - Optional details about the property
- Select the booking channels where this property is listed
- Click Save to add the property
Your new property will now appear in your properties list and be available for booking management.
Editing a Property
Need to update property information or change connected channels?
- Find the property you want to modify in the Properties list
- Click the Edit button next to that property
- Update any fields as needed:
- Change the property name
- Update the address
- Modify the description
- Add or remove booking channels
- Click Save to apply your changes
Deleting a Property
If you no longer manage a property and want to remove it:
- Locate the property in your Properties list
- Click the Delete button
- Confirm the deletion when prompted
Warning: Deleting a property will remove all associated bookings and data. This action cannot be undone. Make sure to export any data you need before deleting a property.
Property Channels
RoostSync supports integration with multiple booking platforms. When setting up or editing a property, you can specify which channels the property is listed on:
- Airbnb - The popular vacation rental marketplace
- Agoda - Asia-focused travel platform
- Booking.com - Global hotel and accommodation booking site
- Direct - Bookings made directly with you (phone, email, walk-ins)
Selecting the appropriate channels helps you:
- Track where each booking originates
- Identify your most effective platforms
- Manage multi-platform listings from one dashboard
Tip: Even if a property is listed on multiple platforms, you only need to add it once in RoostSync. Simply select all applicable channels when configuring the property.
Guest Messaging
Each property can have customized guest messaging templates for automated communications. This includes check-in instructions, welcome messages, and checkout reminders.
For detailed instructions on setting up guest messaging for your properties, see the Guest Messaging Guide.
Next Steps
After configuring your properties, you may want to:
- Invite team members - Add staff who help manage bookings (see Team Members tab)
- Set up calendar sync - Connect external calendars from Airbnb and other platforms
- Configure integrations - Connect Gmail for automatic booking detection
- Customize guest messaging - Set up automated messages for each property
Need Help?
If you encounter any issues while configuring your property settings:
- Check that you have Owner or Full Access role permissions
- Ensure all required fields are filled in before saving
- Try refreshing the page if changes do not appear
- Contact support if problems persist