Managing Bookings
Welcome to the RoostSync booking management guide. This guide will walk you through everything you need to know about viewing, creating, and managing your property bookings effectively.
Table of Contents
- Viewing Your Bookings
- Filtering and Searching Bookings
- Adding Manual Bookings
- Viewing Booking Details
- Understanding Booking Statuses
- Exporting Bookings to CSV
- Syncing Emails to Import Bookings
Viewing Your Bookings
RoostSync offers two ways to view your bookings: List view and Calendar view. Each has its advantages depending on what you need to accomplish.
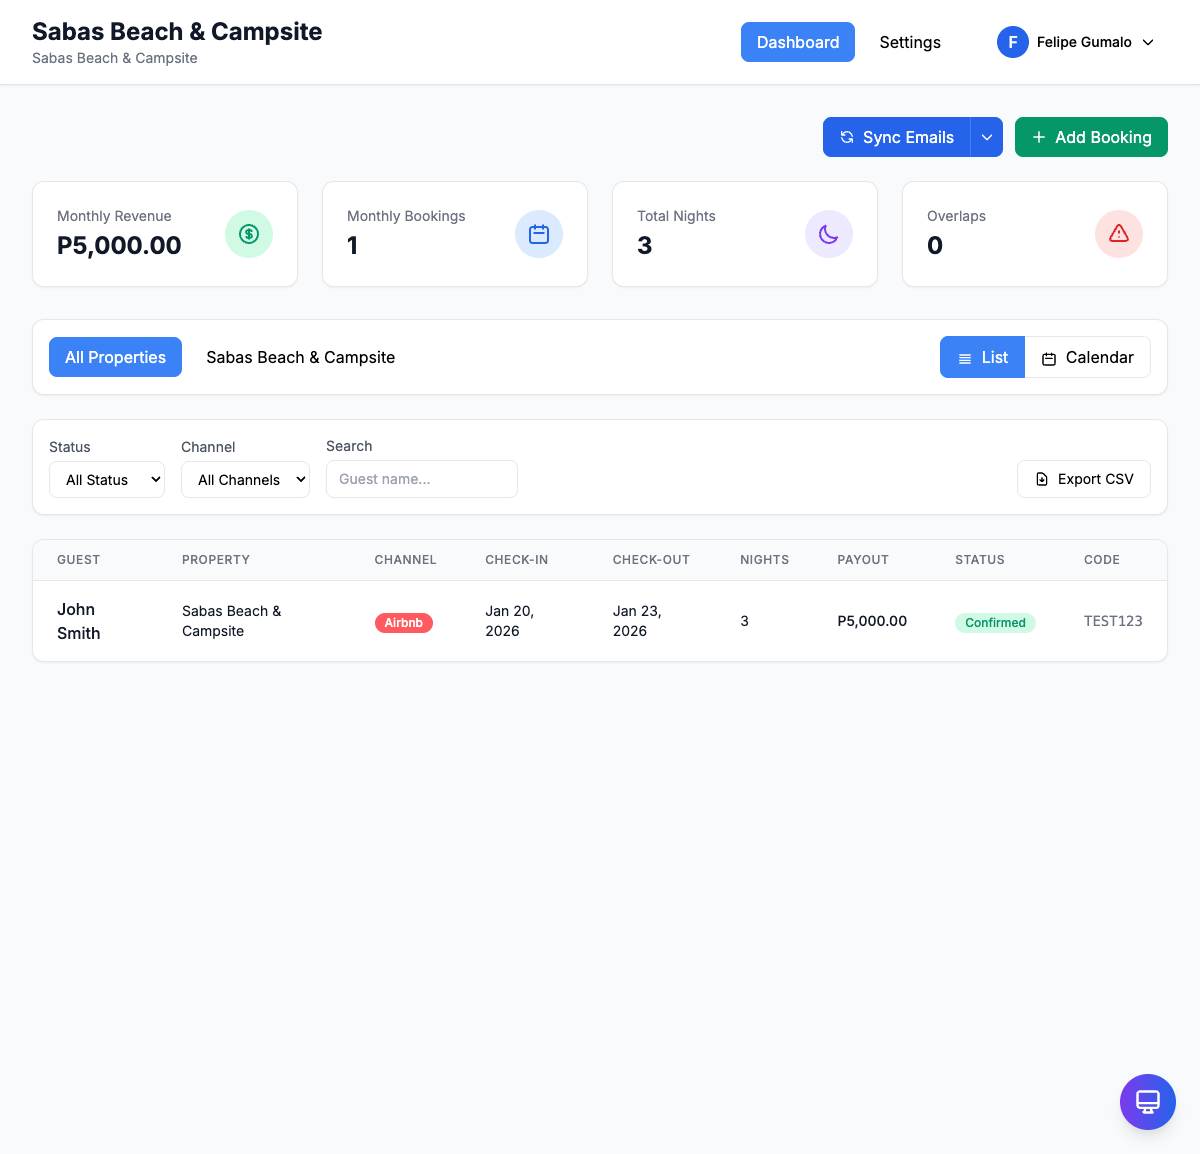
List View
The List view displays all your bookings in a table format, making it easy to scan through multiple bookings quickly.
When to use List view:
- Reviewing a large number of bookings at once
- Sorting bookings by guest name, check-in date, or payout amount
- Quickly finding a specific booking by scrolling or searching
- Exporting booking data to CSV
In List view, each row shows:
- Guest name
- Property
- Check-in and check-out dates
- Booking channel (Airbnb, Agoda, Direct)
- Status (Confirmed, Pending, Cancelled)
- Payout amount
Click on any row to open the full booking details.
Calendar View
The Calendar view provides a visual representation of your bookings across time, displayed as colored bars spanning from check-in to check-out dates.

Color coding by channel:
- Red - Airbnb bookings
- Blue - Agoda bookings
- Green - Direct bookings
When to use Calendar view:
- Checking availability for specific dates
- Spotting gaps between bookings
- Identifying potential overlaps or double-bookings
- Getting a visual overview of occupancy for the month
To switch between views, click the List or Calendar tab at the top of the bookings section.
Filtering and Searching Bookings
When you have many bookings, filters help you find exactly what you need.
Filter by Status
Use the status filter to show only:
- Confirmed - Bookings that are confirmed and active
- Pending - Bookings awaiting confirmation
- Cancelled - Cancelled bookings (useful for record-keeping)
Filter by Channel
Filter bookings by their source:
- All Channels - Show all bookings
- Airbnb - Only Airbnb bookings
- Agoda - Only Agoda bookings
- Direct - Only direct bookings
Search
Use the search box to find bookings by:
- Guest name (e.g., "John Smith")
- Confirmation code (e.g., "HM12345")
- Property name
Example: If a guest calls asking about their reservation, simply type their name in the search box to pull up their booking instantly.
Adding Manual Bookings
For direct bookings, walk-ins, or reservations from channels not connected to email sync, you can add bookings manually.
To add a booking:
- Click the + Add Booking button in the top right corner
- Fill in the booking details:
- Guest Name - Enter the guest's full name
- Property - Select the property from the dropdown
- Check-in Date - Select arrival date
- Check-out Date - Select departure date
- Number of Guests - Enter how many guests
- Channel - Select the booking source (Direct, Airbnb, Agoda, etc.)
- Confirmation Code - Enter if available (e.g., from phone booking)
- Payout Amount - Enter the total amount
- Status - Set to Confirmed, Pending, or Cancelled
- Click Save Booking
Tip: For phone reservations, use "Direct" as the channel and note the caller's phone number in the guest name field or confirmation code for easy reference.
Viewing Booking Details
Click on any booking to open the booking detail modal, which shows all information about the reservation.
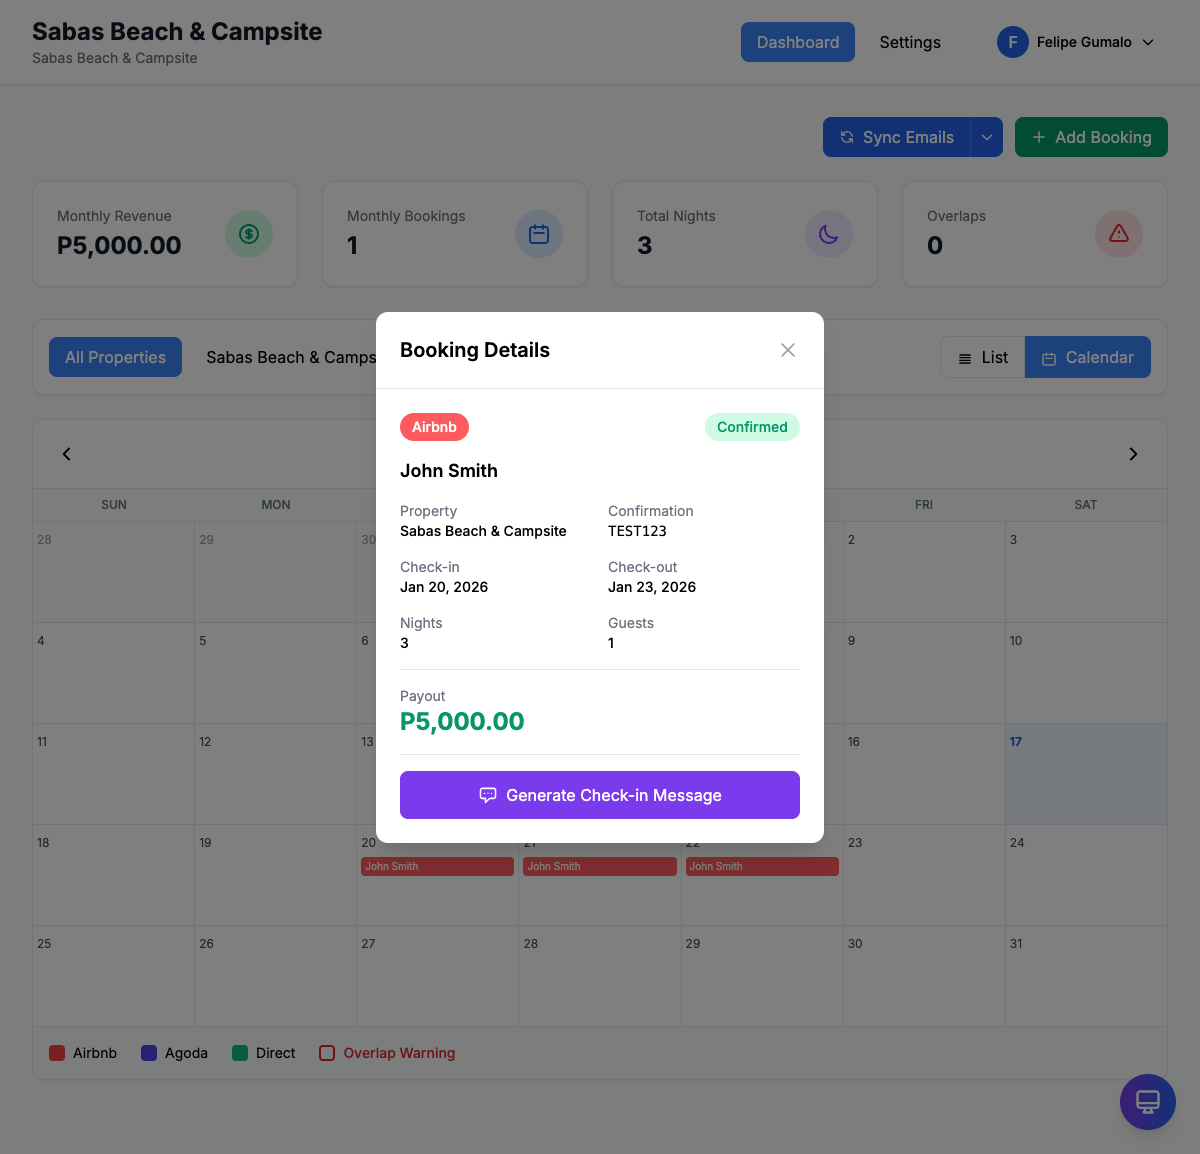
The booking detail modal displays:
| Field | Description |
|---|---|
| Channel Badge | Shows the booking source (Airbnb, Agoda, Direct) with a colored badge |
| Status | Current booking status (Confirmed, Pending, Cancelled) |
| Guest Name | The name of the guest |
| Property | Which property the booking is for |
| Confirmation Code | The unique booking reference number |
| Check-in Date | Arrival date |
| Check-out Date | Departure date |
| Number of Nights | Calculated length of stay |
| Number of Guests | How many guests are staying |
| Payout Amount | The total payout for this booking |
Generate Check-in Message
The booking detail modal includes a Generate Check-in Message button. Click this to create a personalized welcome message for your guest that includes:
- Guest's name
- Check-in date and time
- Property address and directions
- Access instructions
You can copy this message and send it to your guest via the platform's messaging system or directly via SMS/WhatsApp.
Understanding Booking Statuses
Each booking has a status that helps you track where it stands:
Confirmed
A confirmed booking means the reservation is locked in and you should expect the guest to arrive. This is the default status for most bookings imported from Airbnb or Agoda.
What to do: Prepare the property for the guest's arrival. No further action needed unless the guest contacts you.
Pending
A pending booking is awaiting confirmation. This might happen when:
- You've created a manual booking but haven't finalized it yet
- A guest requested a booking but payment hasn't cleared
- You're holding dates for a potential guest
What to do: Follow up on pending bookings to either confirm or cancel them. Don't leave bookings in pending status for too long, as it may cause confusion about availability.
Cancelled
A cancelled booking means the reservation is no longer active. The dates are now available for other guests.
What to do: Cancelled bookings remain in your records for reference. You can filter them out using the status filter if you don't want to see them in your list.
Tip: When a guest cancels, always update the booking status to Cancelled rather than deleting it. This maintains your booking history and helps with reporting.
Exporting Bookings to CSV
Export your booking data to CSV format for use in spreadsheets, accounting software, or record-keeping.
To export bookings:
- Go to the Bookings section
- Apply any filters you want (the export will include only filtered results)
- Click the Export CSV button
- A CSV file will download to your computer
The exported file includes:
- Guest name
- Property name
- Check-in and check-out dates
- Number of nights
- Number of guests
- Channel
- Confirmation code
- Payout amount
- Status
Common uses for exported data:
- Monthly revenue reports
- Tax preparation
- Sharing booking lists with cleaning staff
- Backing up your booking records
- Importing into accounting software
Syncing Emails to Import Bookings
One of RoostSync's most powerful features is automatic booking import from your email. Instead of manually entering every booking, the system can read your confirmation emails and create bookings automatically.
Setting Up Email Sync
- Go to Settings > Email Integration
- Click Connect Gmail
- Sign in with the Gmail account that receives your booking confirmations
- Grant the necessary permissions
- Click Allow
Once connected, RoostSync will:
- Monitor your inbox for booking confirmation emails
- Automatically parse emails from Airbnb and Agoda
- Create bookings with all the details extracted from the email
Manual Email Sync
To check for new booking emails immediately:
- Click the Sync Emails button on the dashboard
- The system will scan for new booking confirmation emails
- Any new bookings found will be added to your list
Tip: Run a manual sync after receiving a booking confirmation to see it appear in RoostSync right away, rather than waiting for the automatic sync.
Supported Email Formats
Email sync currently supports confirmations from:
- Airbnb - New bookings, modifications, and cancellations
- Agoda - Booking confirmations
Coming soon:
- Booking.com confirmations
Troubleshooting Email Sync
If bookings aren't syncing:
- Check connection status - Go to Settings > Email Integration and verify Gmail is connected
- Reconnect Gmail - If the connection shows an error, click "Reconnect Gmail"
- Check your inbox - Make sure booking emails are arriving in your inbox (not spam)
- Property mapping - Ensure your properties have the correct platform IDs configured in Settings > Properties
If a booking email wasn't parsed correctly, you can always add it manually using the + Add Booking button.
Quick Tips
- Keyboard shortcut: Press
Ctrl/Cmd + Nto quickly open the Add Booking form - Avoid overlaps: RoostSync automatically detects double-bookings and shows a warning banner
- Stay organized: Use consistent guest name formats so searching is easier
- Regular syncs: Click Sync Emails daily to ensure all bookings are captured
- Check cancelled: Periodically review cancelled bookings to ensure your calendar is accurate
Need Help?
If you have questions about managing bookings that aren't covered in this guide, please reach out to our support team or check the complete User Guide for more detailed information.