Newsletter & Marketing Content Guide
This guide covers how to use RoostSync's AI-powered marketing features to automatically generate newsletters, blog posts, and social media content for your properties.
Accessing the Marketing Tab
- Log in to your RoostSync dashboard
- Click the Settings icon (gear icon) in the navigation
- Select the Marketing tab from the settings menu
You will see the Marketing Content settings panel with toggle switches for different content types.
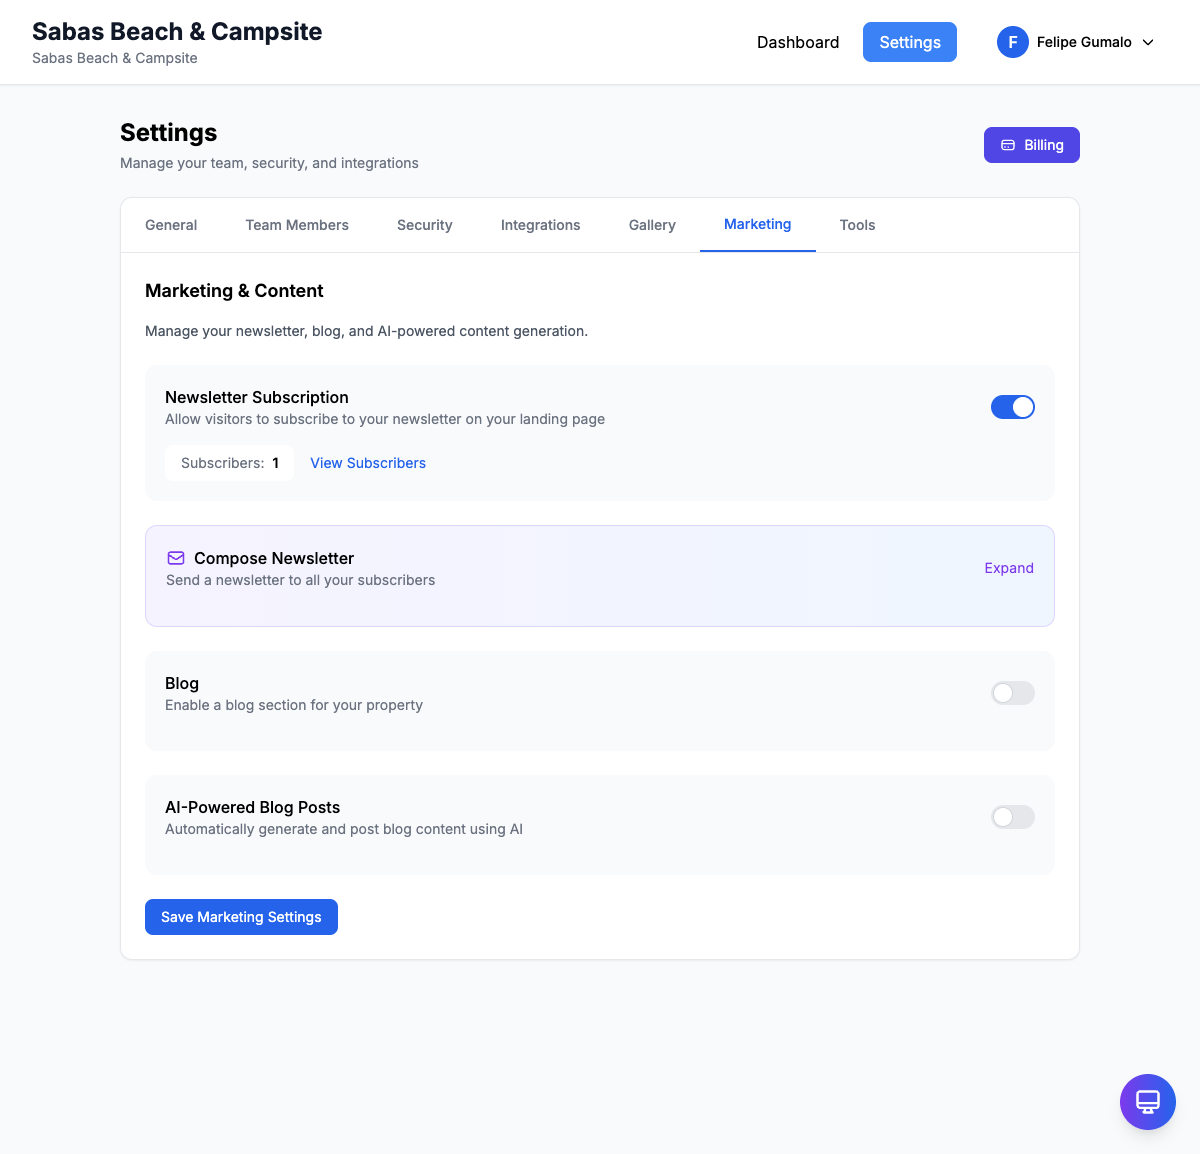
Content Settings and Toggles
The Marketing tab provides three main content generation options. Each can be enabled or disabled independently using the toggle switches.
Monthly Newsletter
When enabled, RoostSync automatically generates a monthly newsletter about your properties.
What it includes:
- Property highlights and updates
- Recent guest reviews and testimonials
- Seasonal promotions and availability
- Local area recommendations and events
- Booking tips and reminders
How it works:
- Newsletters are generated on the 1st of each month
- Content is personalized based on your property details
- You receive a preview email before it goes out
- Perfect for keeping past guests engaged and encouraging repeat bookings
Toggle: Switch ON to enable monthly newsletter generation
Blog Posts
Enable this option to have AI-generated blog content created for your property website.
What it includes:
- Articles about local attractions and activities
- Travel tips for guests visiting your area
- Seasonal guides (best time to visit, what to pack, etc.)
- Property feature highlights
- Guest experience stories
How it works:
- Blog posts are generated based on topics you specify
- Content is SEO-optimized for better search visibility
- Posts can be automatically published or held for review
- Helps drive organic traffic to your booking page
Toggle: Switch ON to enable AI blog post generation
Social Media Posts
Automatically create engaging social media content to promote your properties.
What it includes:
- Property photo captions
- Promotional posts about availability
- Guest review highlights
- Local event announcements
- Seasonal and holiday-themed content
How it works:
- Posts are tailored for different platforms (Facebook, Instagram)
- Content is generated based on your property photos and details
- Posts can be scheduled in advance
- Maintains consistent social media presence without manual effort
Toggle: Switch ON to enable AI social media content generation
Understanding How AI Content Generation Works
RoostSync uses advanced AI to create marketing content that sounds natural and authentic to your brand.
What the AI Uses
The AI generates content based on:
- Property Information - Your property names, descriptions, amenities, and features
- Location Details - Local attractions, activities, and points of interest
- Guest Reviews - Positive feedback and testimonials from past guests
- Photos - Visual content from your property gallery
- Booking History - Seasonal trends and popular booking periods
Content Quality
- All generated content is reviewed for accuracy and tone
- Content avoids generic phrases and focuses on your unique offerings
- The AI learns from your preferences over time
- You can always edit or reject any generated content before publishing
Privacy and Data
- Guest personal information is never included in marketing content
- Only approved property details are used
- Content is generated securely within the platform
Setting Up Your Content Preferences
To get the best results from AI-generated content, take time to configure your preferences.
Step 1: Complete Your Property Profiles
The more information you provide, the better the AI content will be.
- Go to Settings > Properties
- For each property, ensure you have:
- Detailed descriptions
- Complete amenity lists
- High-quality photos
- Location highlights
Step 2: Define Your Topics
Specify what topics you want your content to focus on.
- In the Marketing tab, look for Content Topics
- Enter topics separated by commas
- Examples:
beach activities, water sports, sunset views, local seafoodmountain hiking, wildlife, stargazing, cozy retreatscity tours, nightlife, cultural experiences, foodie destinations
Step 3: Set Your Posting Frequency
Choose how often content should be generated:
- Weekly - New content every week
- Bi-weekly - Content on the 1st and 15th of each month
- Monthly - One piece of content per month
Step 4: Review and Approve
Before content goes live:
- Check your email for content previews
- Review the generated content
- Make edits if needed
- Approve for publishing or request regeneration
Best Practices
For Newsletters
- Keep your subscriber list up to date
- Include a clear call-to-action (Book Now, Check Availability)
- Review the preview to ensure accuracy
For Blog Posts
- Focus on topics your target guests care about
- Include internal links to your booking pages
- Add your own photos when possible
For Social Media
- Respond to comments on AI-generated posts
- Mix AI content with your own personal posts
- Use hashtags relevant to your location
Troubleshooting
Content Not Generating
- Ensure the toggle is switched ON
- Check that your property profiles are complete
- Verify your subscription plan includes marketing features
Content Quality Issues
- Add more details to your property descriptions
- Update your topic preferences
- Provide feedback through the content review system
Not Receiving Preview Emails
- Check your spam folder
- Verify your email address in account settings
- Ensure email notifications are enabled
Need Help?
If you have questions about the marketing features:
- Contact support for assistance with content generation
- Visit the help center for additional resources